Tame Your Excel Cells: Mastering Text-Fitting Height
Wrestling with overflowing text in your Excel spreadsheets? It's a common frustration: meticulously crafted data obscured by cells too short to display it properly. But what if you could make Excel automatically adjust cell height to accommodate your text, ensuring everything is perfectly visible and professionally presented?
Imagine creating reports where every piece of information is clear at a glance, or designing invoices where product descriptions are never truncated. This dream becomes a reality when you understand how to manage Excel's cell height. This article will equip you with the knowledge to dynamically resize cell heights, ensuring your spreadsheets are both functional and visually appealing.
Adjusting Excel cell height for text isn't just about aesthetics; it's about clarity and efficient data consumption. When cell contents are fully visible, you reduce the risk of misinterpreting data and eliminate the need for time-consuming manual adjustments. This fundamental skill enhances both the creation and interpretation of your spreadsheets.
While modern spreadsheet software has evolved significantly, the core challenge of managing cell size remains. From the early days of spreadsheet applications, users have sought ways to dynamically adjust cell dimensions based on content. The ability to automatically size rows and columns has become an essential feature, simplifying spreadsheet design and improving readability.
One of the primary issues related to managing cell height is finding the right balance between automatic resizing and manual control. While automatic adjustments offer convenience, they may not always align with specific formatting requirements. Understanding the various methods for controlling cell height is crucial for achieving the desired layout and presentation in your spreadsheets.
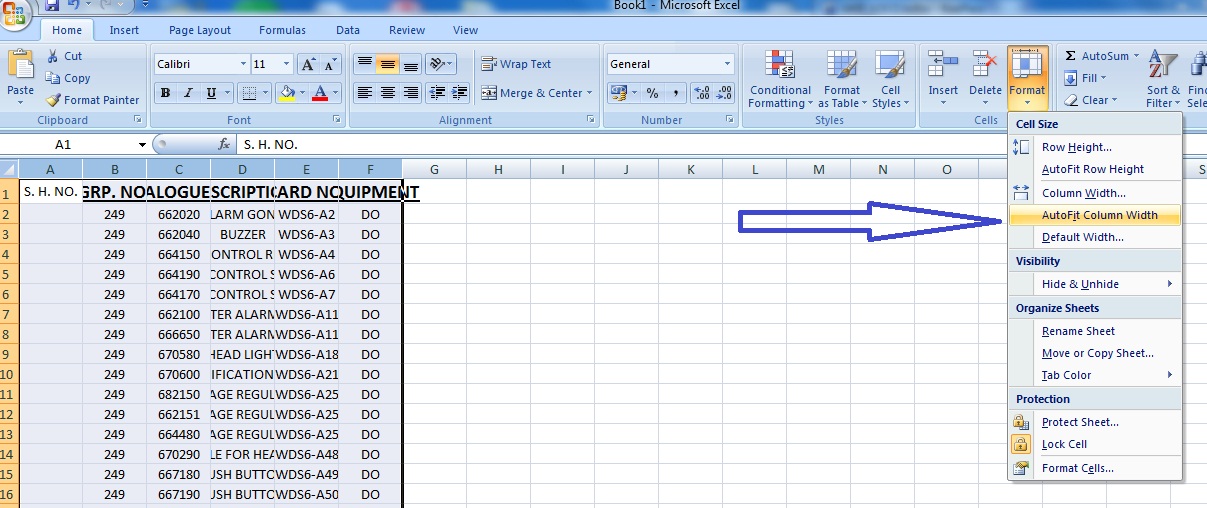
The simplest way to adjust Excel's cell height to fit text is by using the "AutoFit Row Height" feature. This command automatically resizes the selected row(s) so that all the text within the cells is visible. Double-clicking the bottom border of a row header also achieves the same result.
Another approach is using the "Format" option. By selecting the cells you want to modify, right-clicking, and choosing "Format Cells," you can access the "Row Height" setting under the "Row" tab. This allows you to manually specify the exact height you need.
Benefits of Auto-Fitting Cell Height:
1. Enhanced Readability: No more squinting or scrolling to decipher truncated text. All information is instantly visible, improving the overall user experience.
2. Professional Presentation: Cleanly formatted spreadsheets project a professional image. Auto-fitting height ensures a consistent and polished look.
3. Time Savings: Eliminate the manual effort of resizing cells individually. Auto-fitting drastically reduces formatting time, especially in large datasets.
Step-by-Step Guide to Auto-Fitting Cell Height:
1. Select the row or rows you want to adjust.
2. Go to the "Home" tab on the ribbon.
3. In the "Cells" group, click "Format."
4. Under "Cell Size," click "AutoFit Row Height."
Advantages and Disadvantages of Auto-Fitting
| Advantages | Disadvantages |
|---|---|
| Saves time | May not be suitable for all formatting needs |
| Improves readability | Can disrupt carefully planned row heights |
| Enhances professional appearance | May result in uneven row heights across the spreadsheet |
Best Practices:
1. Use Wrap Text: Combine AutoFit with "Wrap Text" to handle long sentences effectively within cells.
2. Consider Font Size: Larger fonts require more height. Adjust font size before auto-fitting.
3. Test with Different Data: Ensure auto-fitting works as intended with various data types and lengths.
4. Manual Adjustments for Fine-Tuning: After auto-fitting, you can manually adjust heights for specific design needs.
5. Be Mindful of Merged Cells: AutoFit may behave unexpectedly with merged cells. Adjust manually if needed.
FAQ:
1. How do I make all rows auto-fit in Excel? Select all rows by clicking the top-left corner of the spreadsheet, then use the AutoFit Row Height feature.
2. Can I undo auto-fitting? Yes, use the "Undo" command (Ctrl+Z).
3. What if auto-fitting makes my rows too tall? You can manually adjust the row height after auto-fitting.
4. Does auto-fitting work with merged cells? It can, but it might require manual adjustments afterwards.
5. How do I adjust cell height for multiple rows at once? Select the rows you want to modify before applying auto-fitting.
6. Can I set a minimum row height? Yes, you can use the "Format Cells" option to specify a minimum height.
7. How can I ensure consistent row heights across my spreadsheet? Consider using manual adjustments after auto-fitting to achieve uniformity.
8. Why is my text still cut off after auto-fitting? Check if "Wrap Text" is enabled.
Tips and Tricks:
Use the keyboard shortcut Alt + H + O + A to quickly auto-fit row height.
Mastering Excel cell height adjustments is essential for creating clear, professional, and easy-to-read spreadsheets. By understanding the various methods for auto-fitting and manual adjustment, you can streamline your workflow, improve data visibility, and enhance the overall presentation of your work. Don't let overflowing text detract from the power of your data. Embrace these techniques and transform your spreadsheets into effective communication tools. Start optimizing your Excel cell heights today and experience the difference!
Upgrade your bathroom a guide to installing a single faucet
Ignite your ride the ultimate guide to red car paint colors
Unlocking style the ultimate guide to mid length hair with bangs


